


In March, we announced the launch of SwiftEmail, a powerful new email service built from the ground up for professionals and businesses.
Don't have a SwiftEmail account yet?

If you've created an account, here are instructions to complete the final step - connecting your website domain to SwiftEmail - before you begin sending professional emails.
Questions? Click here to connect with our Support Heroes!
Connecting Your Domain to SwiftEmail
- My domain is registered with GoDaddy
- My domain is registered with Namecheap
If your domain is registered with another registrar, please follow these steps (or forward them to your webmaster/techy friend):
- Log in to your account on the domain registrar's site
- Add the following MX records to your domain
- Type: MX
- TTL: 3600
- Value: 10 mx1.flockmail.com
- Type: MX
- TTL: 3600
- Value: 20 mx2.flockmail.com
- Type: MX
- Add the following SPF Record to your domain
- Type: TXT
- TTL: 3600
- Value: v=spf1 include:spf.flockmail.com ~all
- Type: TXT
That's it, you're all set to send and receive emails from your domain using SwiftEmail! Simply go to your SwiftEmail Account Manager and create the email address(es) you want to use.
Connecting your GoDaddy domain to SwiftEmail
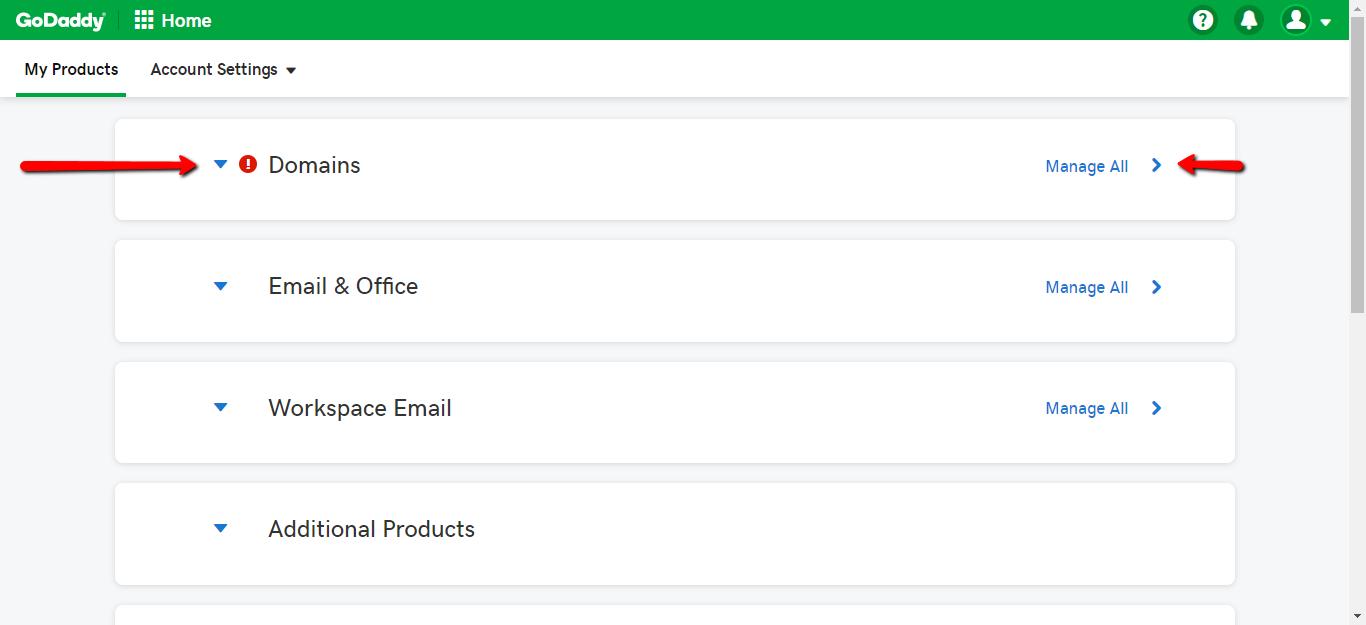
- Log in to your GoDaddy account and navigate to Domain Manager (click here)
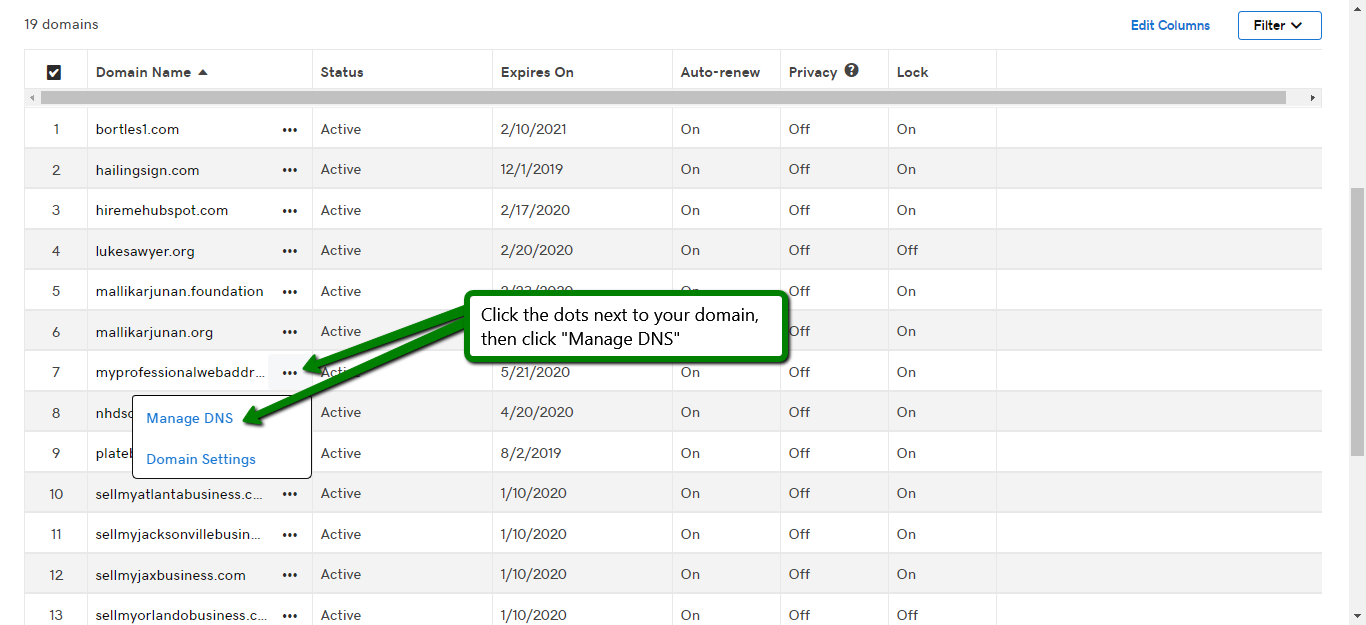
- Scroll down to the domain you want to use to send emails, click the three dots next to it, and click "Manage DNS"
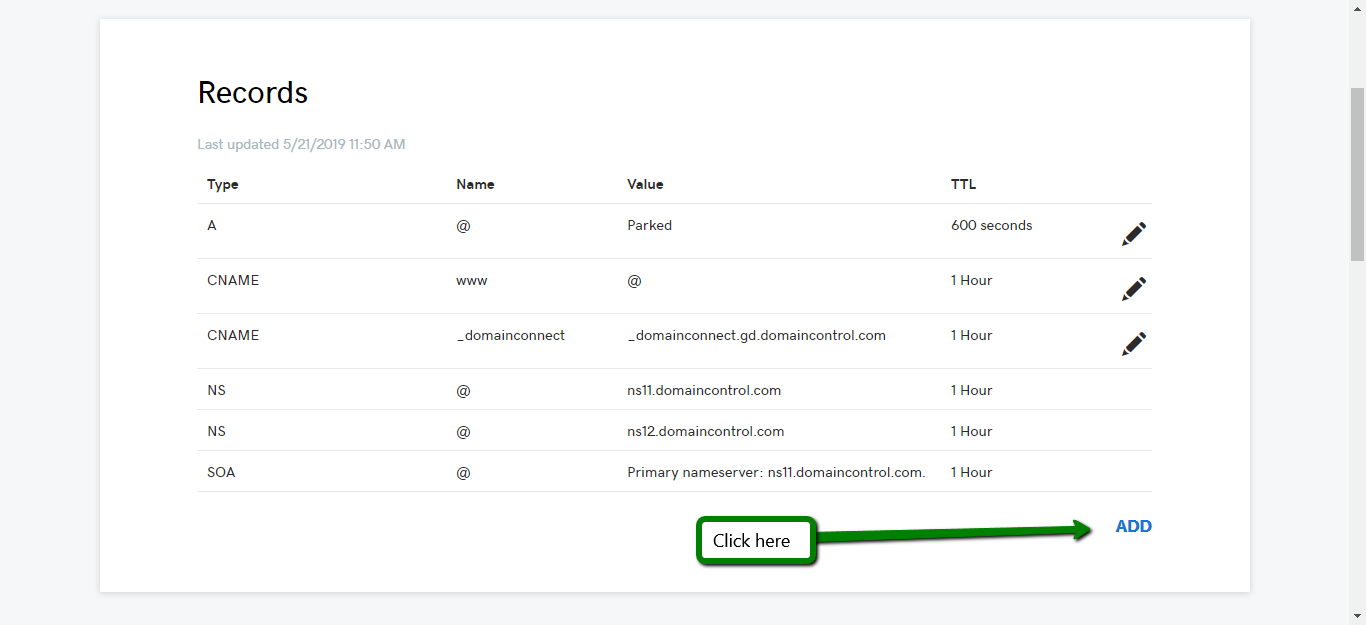
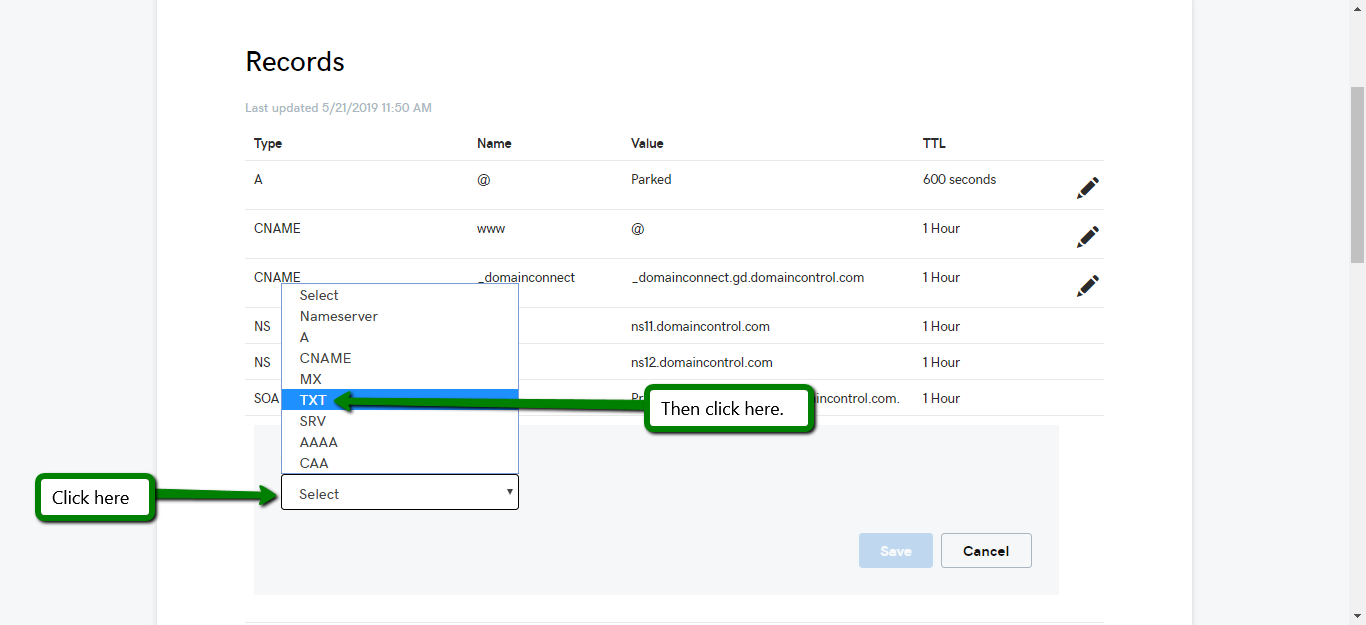
- Scroll down to "Records" and click "Add"
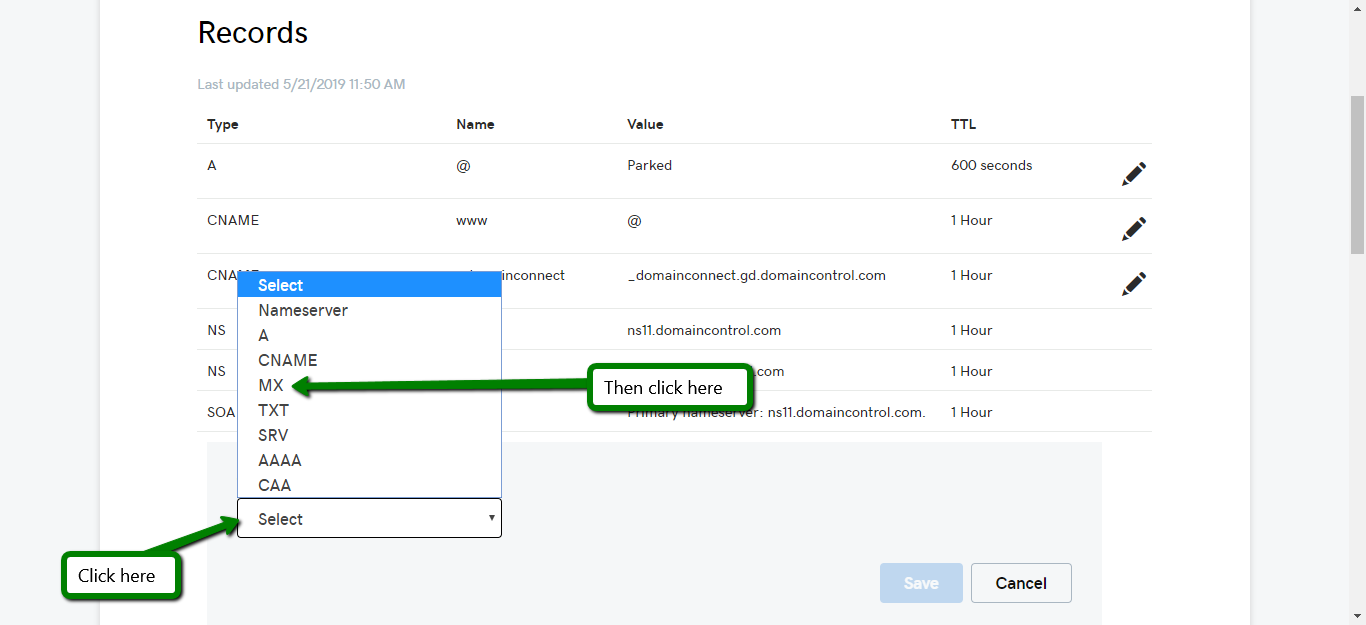
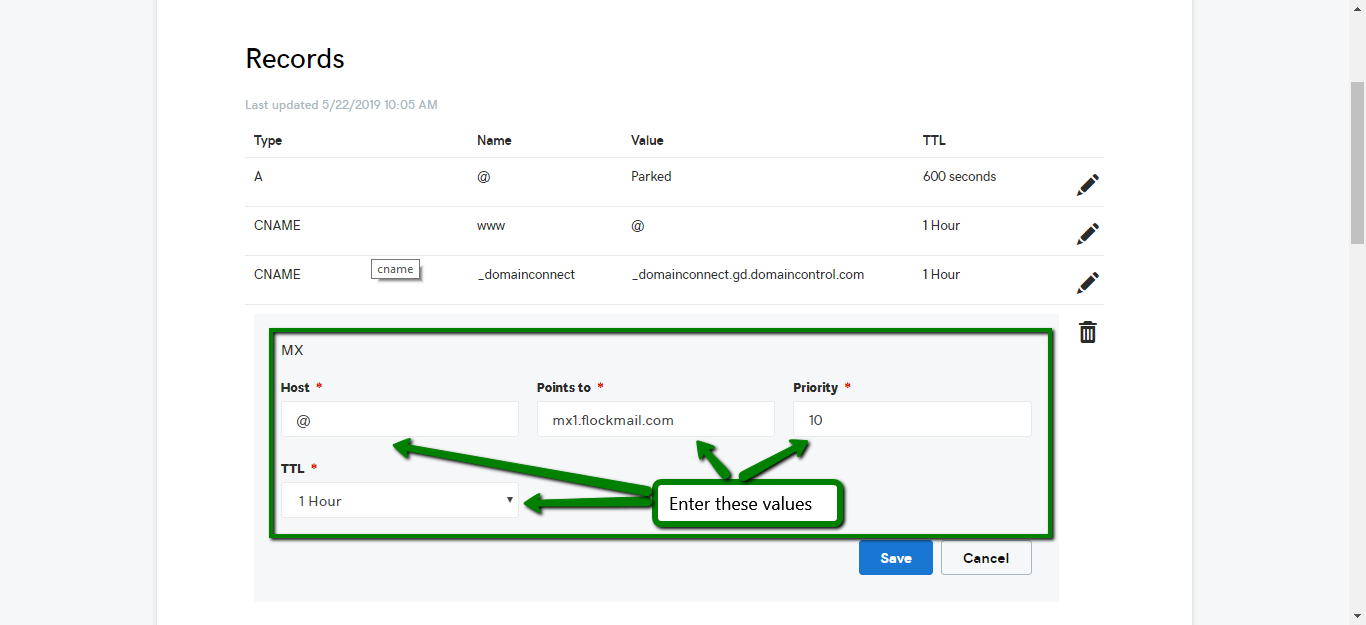
- Click "Type" and then select "MX"
- Enter the following values (omit the quotes)
- Type: MX
- Host: "@"
- Points to: "mx1.flockmail.com"
- Priority: "10"
- TTL: Select "Custom" then enter "3600"
- Click "Add" again and select "TXT"
- Enter the following values (omit the quotes)
- Type: TXT
- Host: "@"
- TXT Value: "v=spf1 include:spf.flockmail.com ~all"
- TTL: Select "Custom" and then enter "3600" under "Seconds"

That's it, you're all set to send and receive emails from your GoDaddy domain using SwiftEmail! Simply go to your SwiftEmail Account Manager and create the email address(es) you want to use.
Connecting your Namecheap domain to SwiftEmail
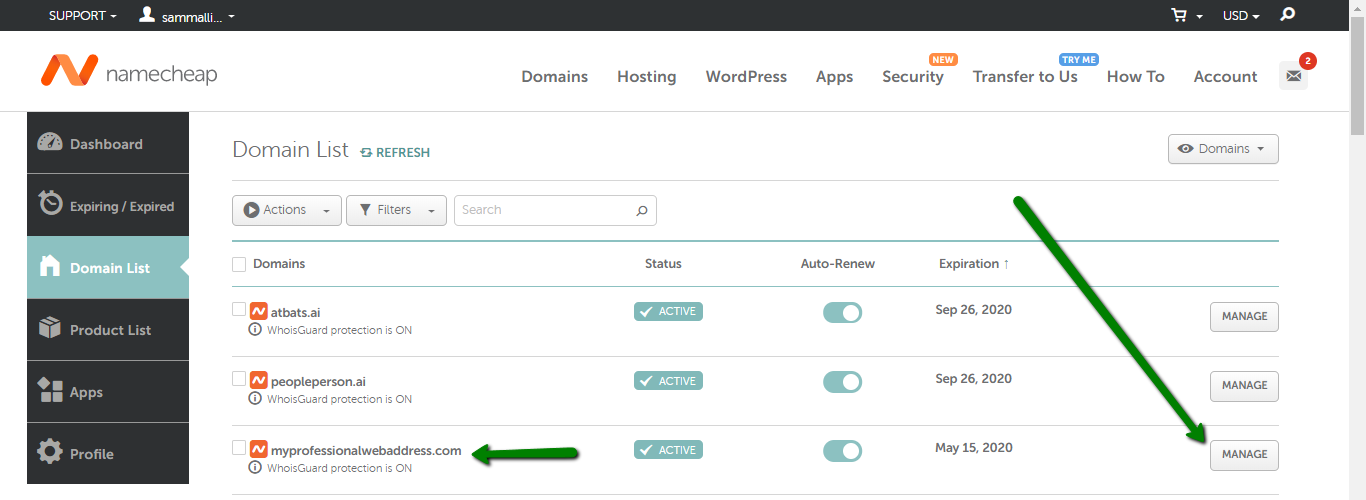
- Log in to your Namecheap account and navigate to the Domains tab (click here)
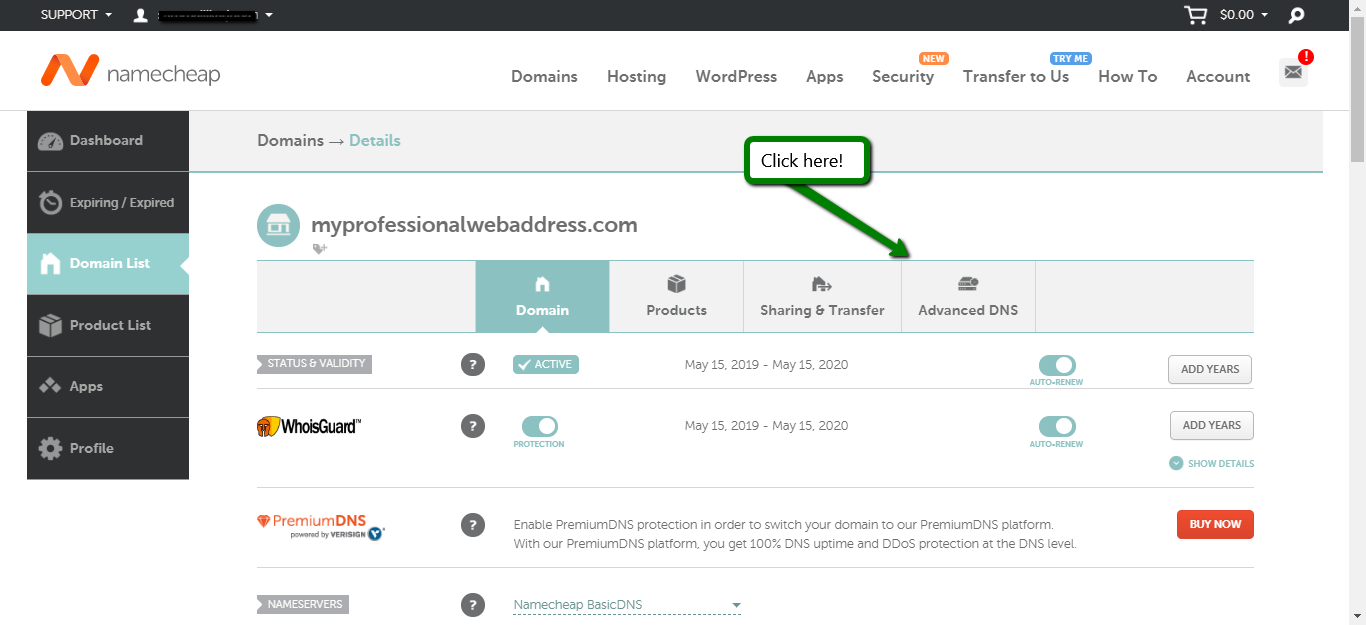
- If you own multiple domains, click "Manage" for the domain you want to send emails from
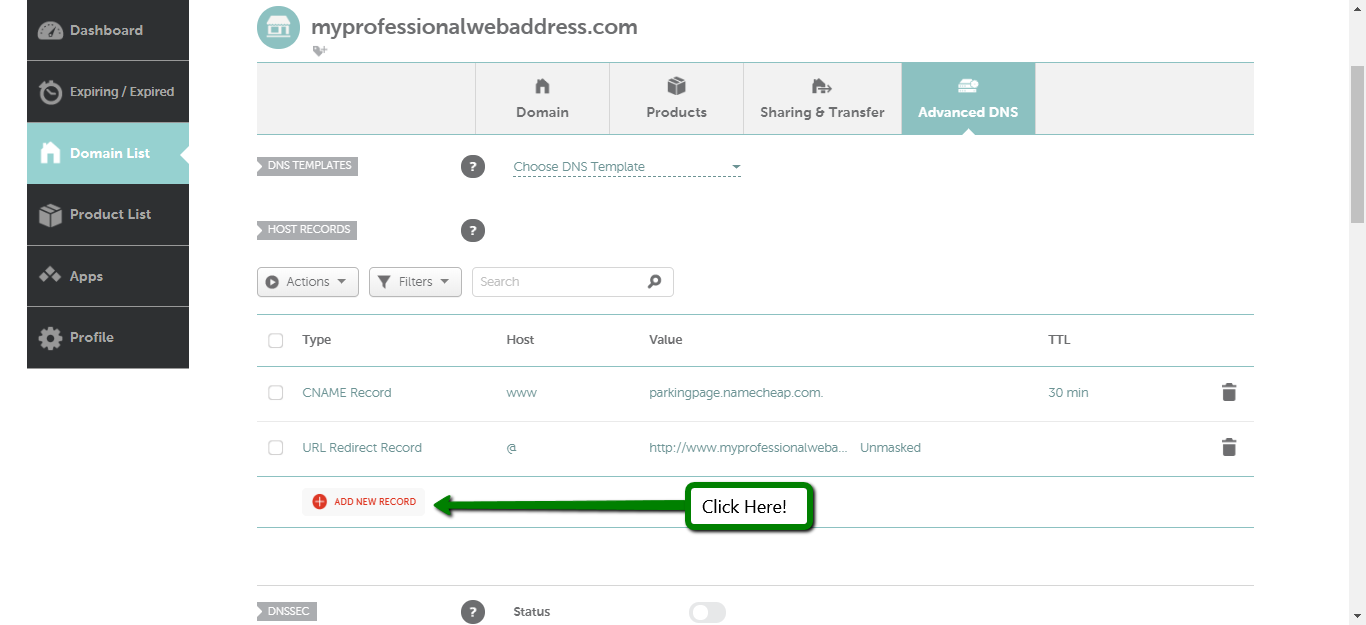
- Click the "Advanced DNS" tab at the top
- Under "Host Records", click "Add New Record"
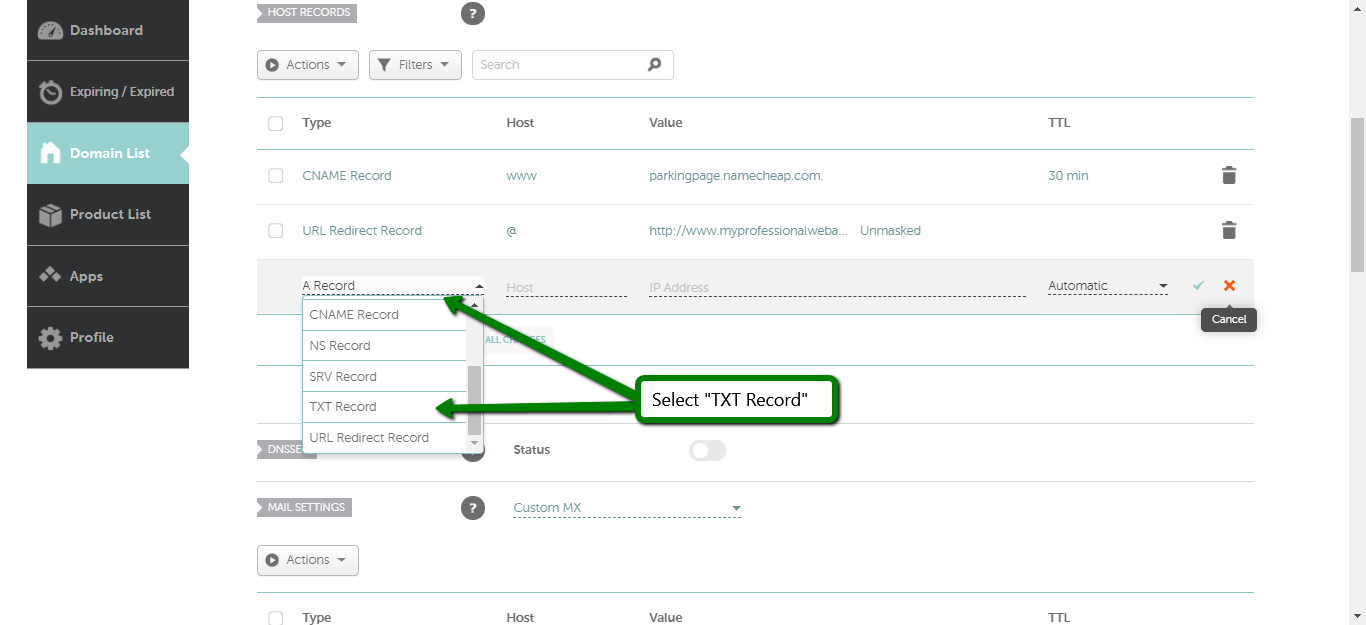
- Select "TXT Record"
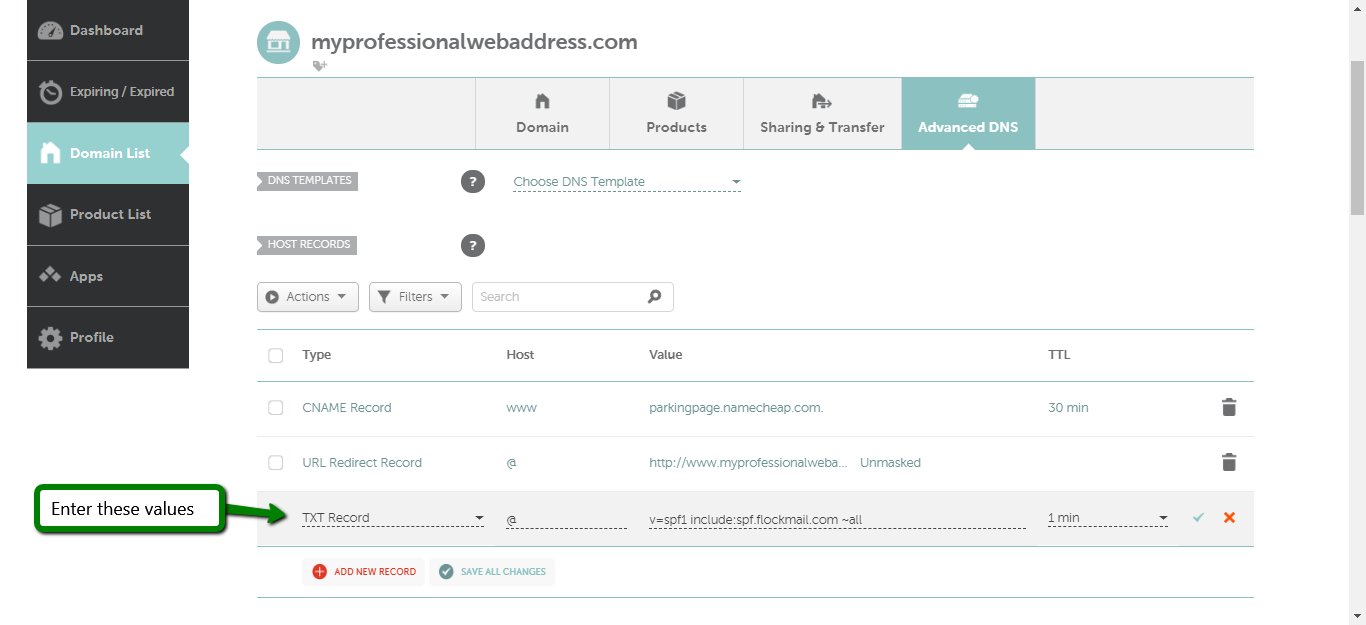
- Enter the following values (omit the quotes) and then, click the green checkmark at the end of the row to accept the changes
- Host: "@"
- Value: "v=spf1 include:spf.flockmail.com ~all"
- TTL: 1 min
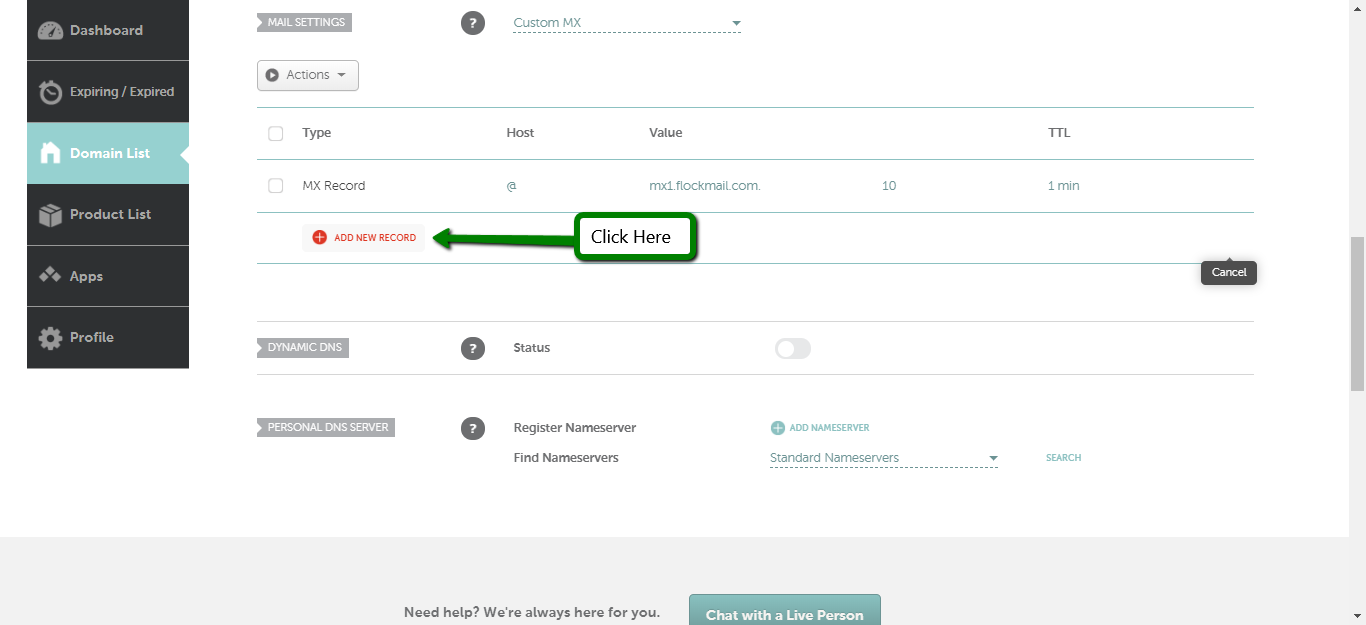
- Scroll down to "Mail Settings" and select "Custom MX"
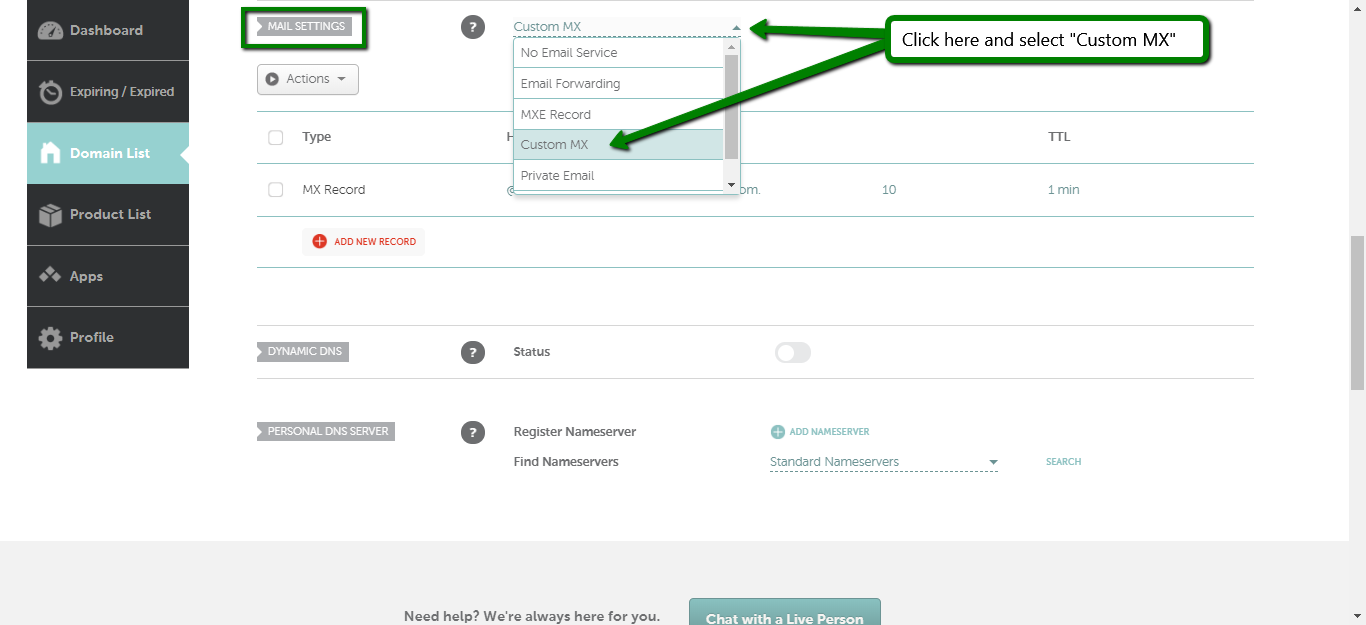
- Click "Add New Record", insert the following values (omit the quotes) and click the green check mark to accept
- Host: "@"
- Value: "mx1.flockmail.com"
- Priority: "10" (this column is unlabeled by Namecheap, but it's the field between "Value" and "TTL")
- TTL: 1 min
That's it, you're all set to send and receive emails from your Namecheap domain using SwiftEmail! Simply go to your SwiftEmail Account Manager and create the email address(es) you want to use.
Need some assistance? We're here to help!