Welcome to Flock! We're so happy you're here.
To help you and your team get up and running, we've assembled a quick guide to get you started with Flock. Scroll down to learn more!
Take a quick video tour of Flock
If you're looking for more how-to information, our knowledge base is another great place to bookmark if you're looking for step by step guides on Flock.
~~~
Table of Contents
Click to jump to a section
Getting Started with Flock: the Short Version
-
Download Flock on your desktop and phone so you can stay connected even on the go. Sign up using your work email and invite the people you work with. Getting your teammates on Flock will make implementing the tool more successful.
-
If needed, create teams for different projects, business units, or interest groups.
-
Create relevant channels to share ideas, brainstorm, and make faster decisions. You can also create channels for social discussions on an interest. For example: #marketingteam or #theofficefans.
-
Share documents and files by simply dragging and dropping them into Flock.
-
Keep your productivity on track with Reminders, Polls, Shared To-dos, Notes, Code Snippet Sharing, and your personal chat tab.
-
Invite vendors, agencies, and clients to your team on Flock as guests. Guests on Flock have limited access — they can access specified contacts and channels only, so you can keep them from seeing sensitive information.
-
Save important messages, files, and links with the Drawer, My Favorites, and in your personal chat tab.
-
Start an audio or video conference, share your screen, and get everyone on the same page.
-
Find your favorite apps in our Appstore, plug them into Flock, so you never have to switch between apps again. Hello Trello on Flock!
-
Or create a webhook to get notifications about important updates via Flock.
We also recommend downloading Flock on your iOS, Android, Mac, and Windows devices so you can collaborate while on the move.
Getting Started with Flock: the Long Version with GIFs!
Start a conversation and create a channel for group conversations
Step 1 - Start messaging: Starting a one-to-one conversation in Flock is easy. Simply click on a person’s name and get talking.
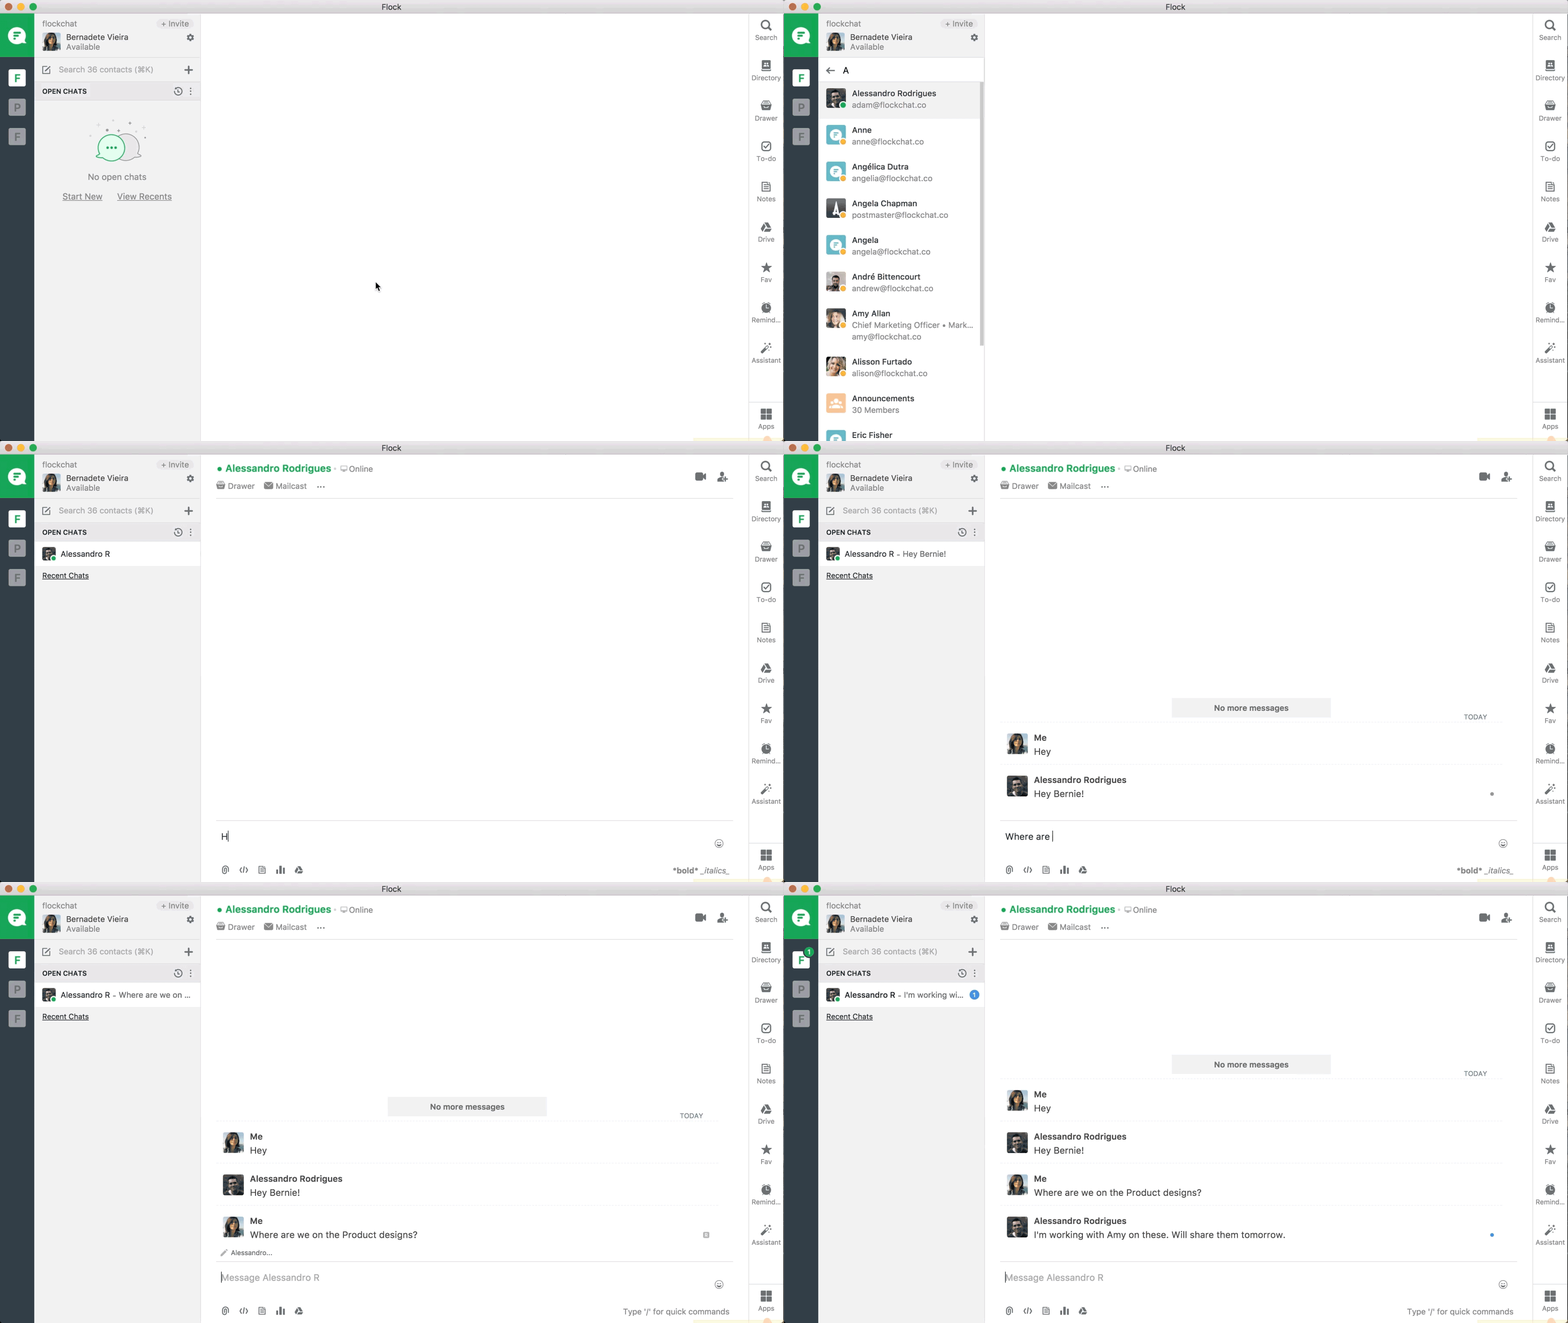
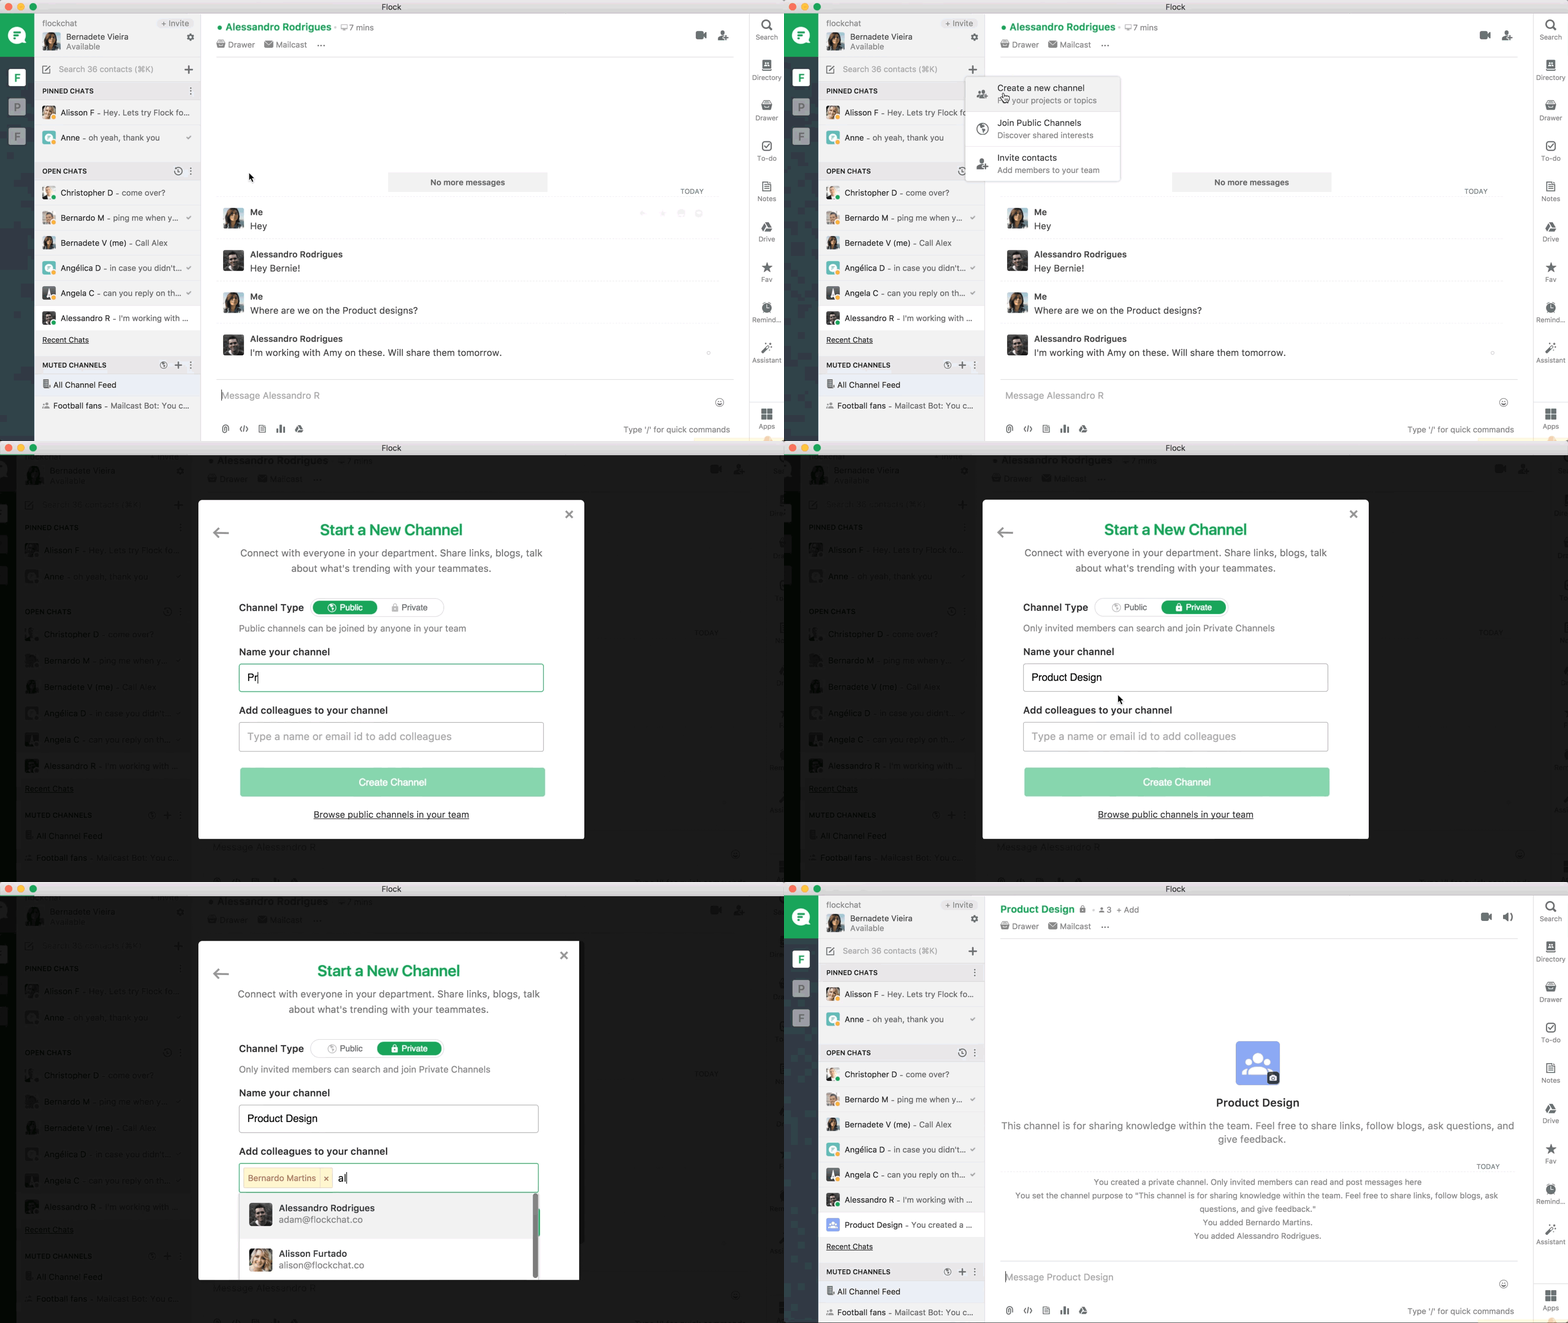
Step 2 - Create group messages through channels: You can invite more teammates to your conversations in two ways:
- Click on Invite next to the channel name and type in their names

- OR click on Create Channel, enter a channel name and add your colleagues
- Alternatively, use the slash command to add members to a conversation. Eg: /add Alister and click on their name.
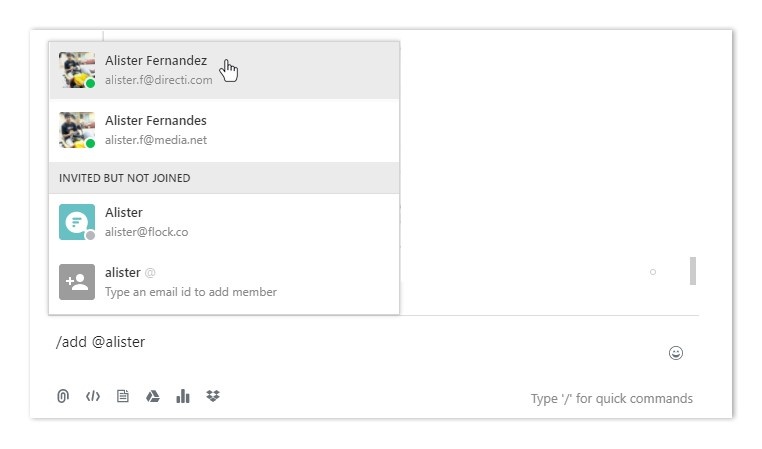
- You can also @mention a teammate who isn’t part of the channel and click on add
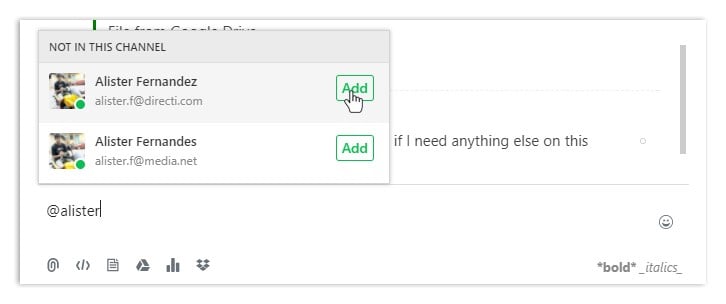
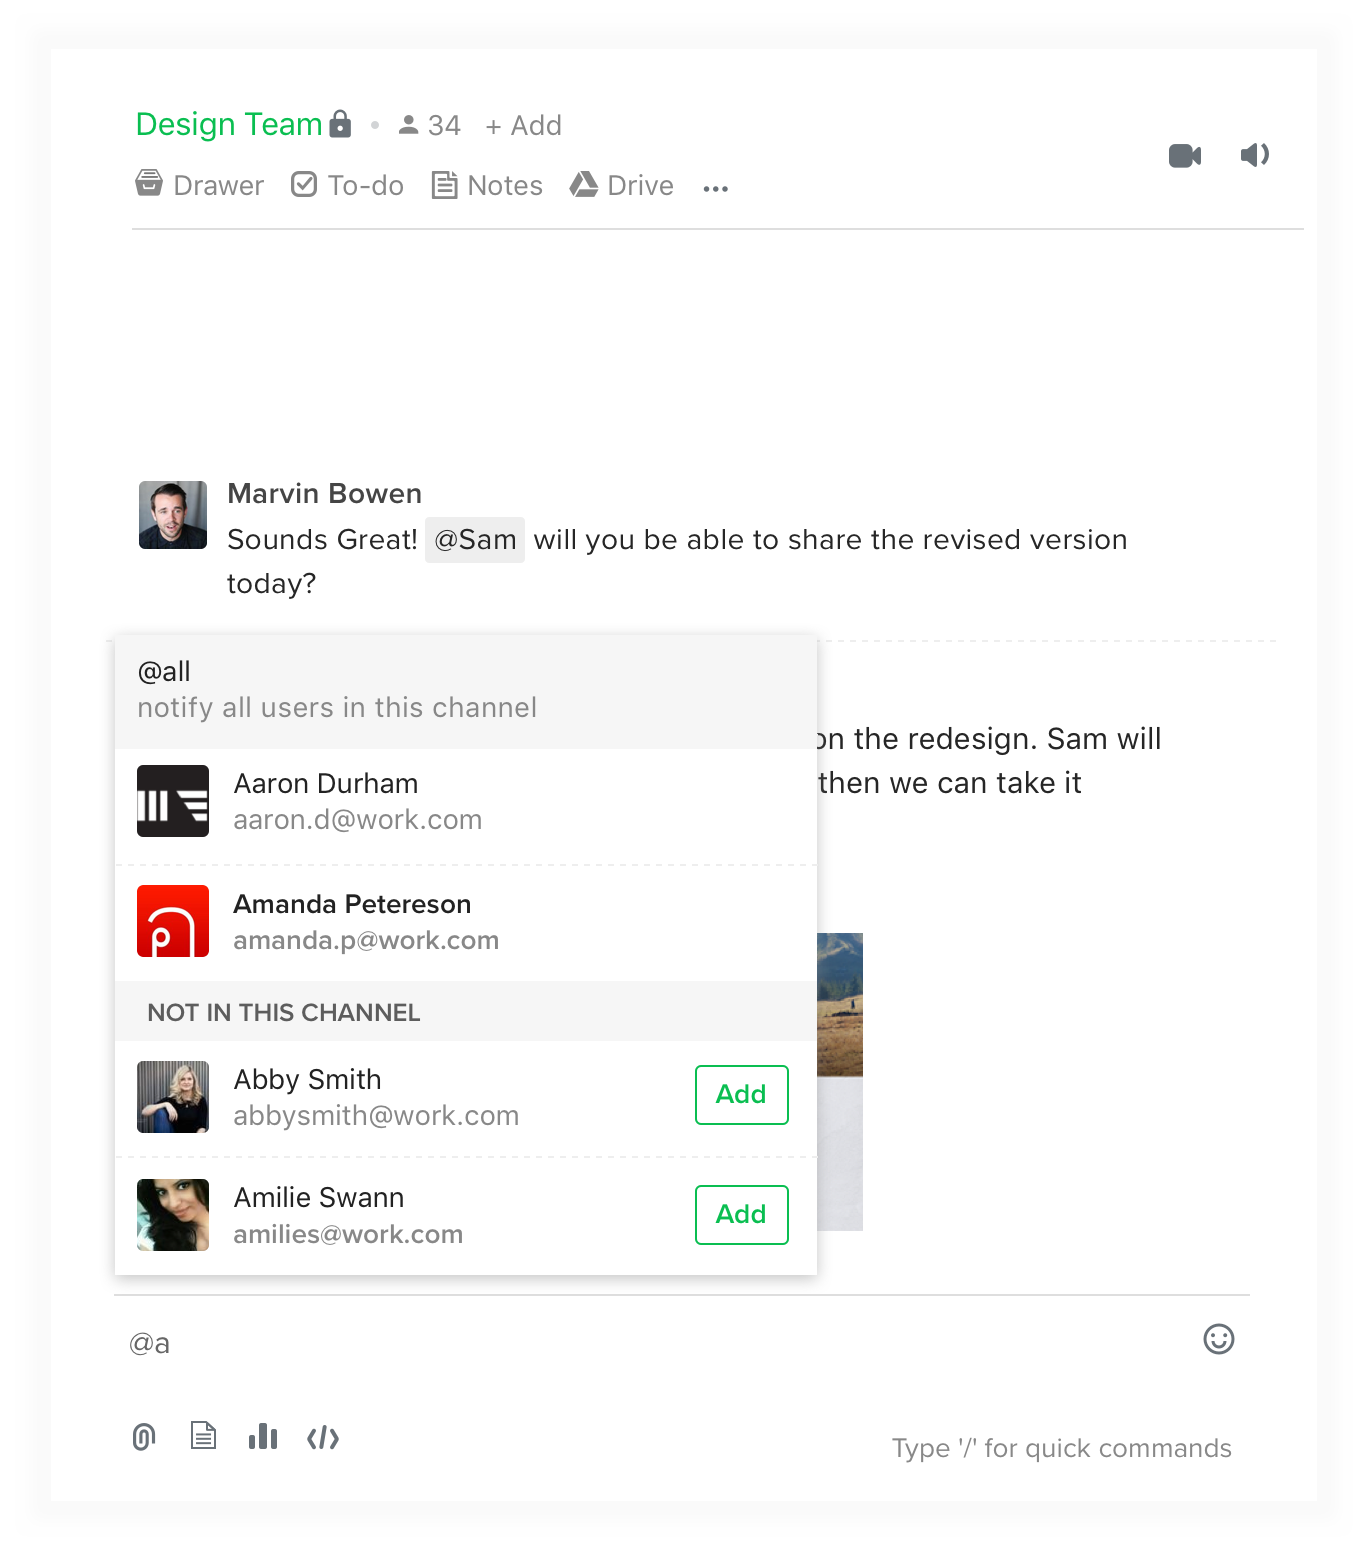
Step 3 - Add new people to your channel or group message: Once you have your teammates added to a channel, you can @mention specific people to get their attention by typing ‘@’ followed by their username.
Starting a Video Conference Call from Flock
Step 1 - Start a Video Call: Want to set up a quick video meeting? Simply get on a video call by clicking on the Video conference button. Alternatively, just type /video in the text field and you’re good to go.
Step 2 - Start an audio call if your wifi is spotty:

You can also set up an audio conference call via the Bridge calling app. Simply click on the Telephone icon in a conversation or channel and a dial in the number will populate in your chat screen. Dial into the number with your phone and enter the pin to start the conference. (Audio calling is currently available for US, Canada, UK, and India-based users. Users in other countries will be given a US number).
Sharing Files on Flock
With Flock, you can share multiple files of all types in a matter of seconds.
- Click on the Share files button to select a file from your local drive.
- OR select multiple files and drag and drop them into the chat window
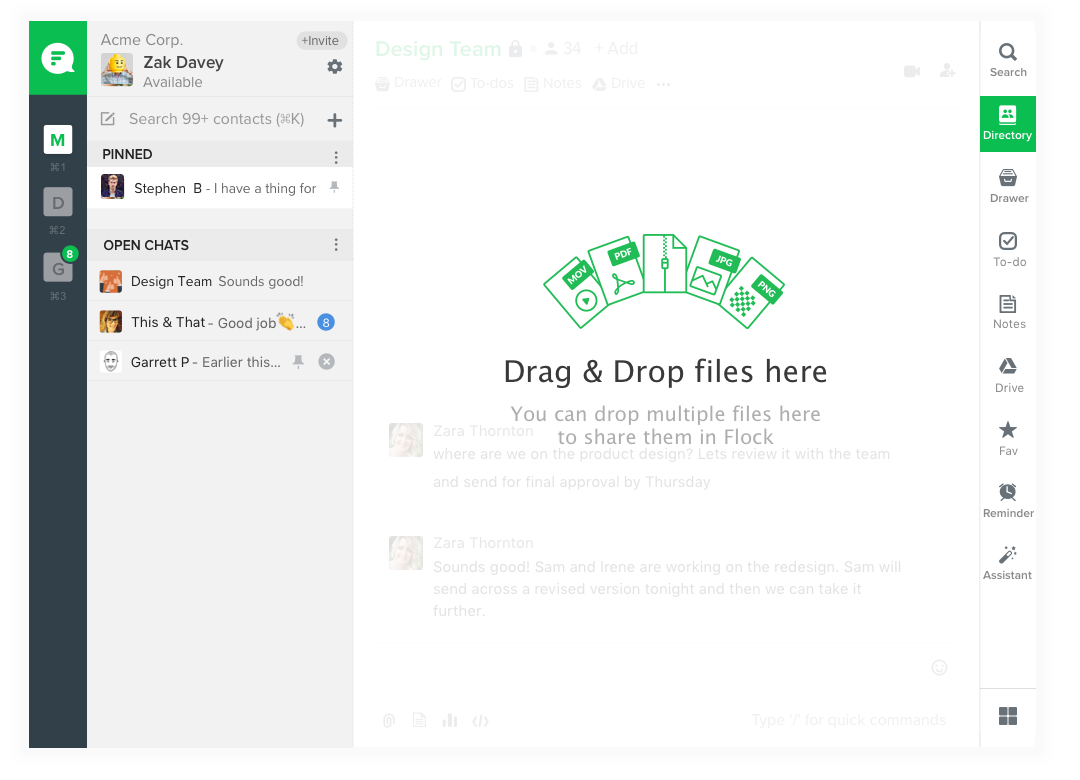
And here’s the best part: Messages and files shared in Flock are instantly searchable, so you can quickly come back to any discussions and documents when you need them.
Adding "Guests" to Flock
You can invite people you collaborate with as Guests to your team on Flock. This could a be freelancer working on a specific project who doesn't need to be part of every conversation at your company. Guests become a part of conversations or channels you specify, but cannot access the rest of your team, channels, and apps.
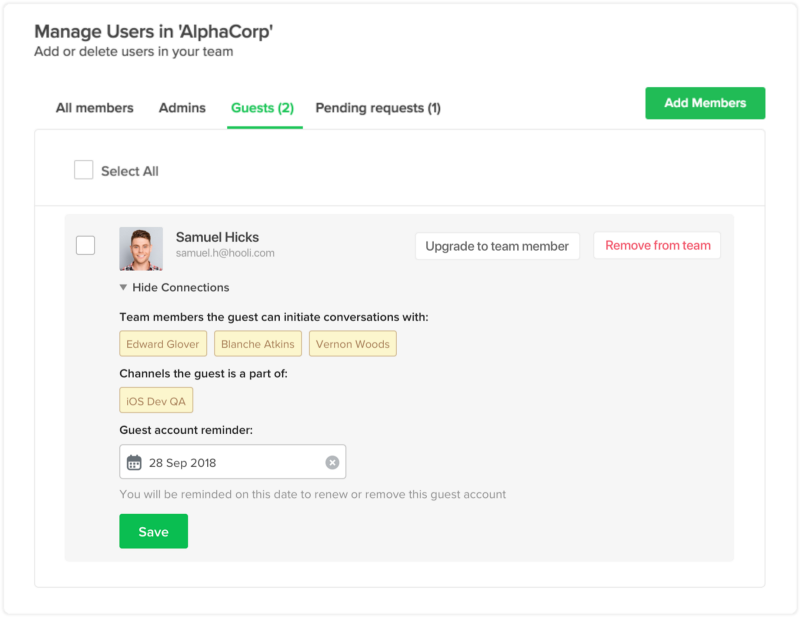
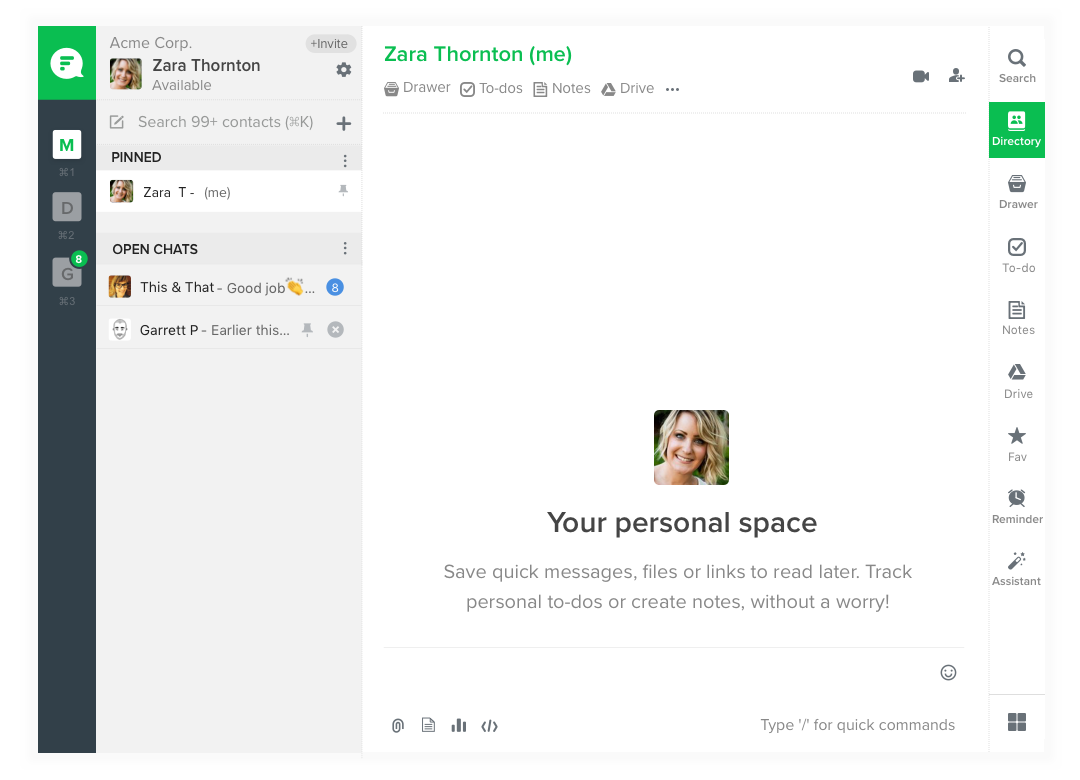
Productivity tools to keep you and your team on track
There are a plethora of productivity tools built into Flock to help you and your team be more effective. They are:
- Create notes and set reminders for yourself
- Save quick messages, files or links to read anytime later
- Use it as a sandbox to try Flock’s cool features
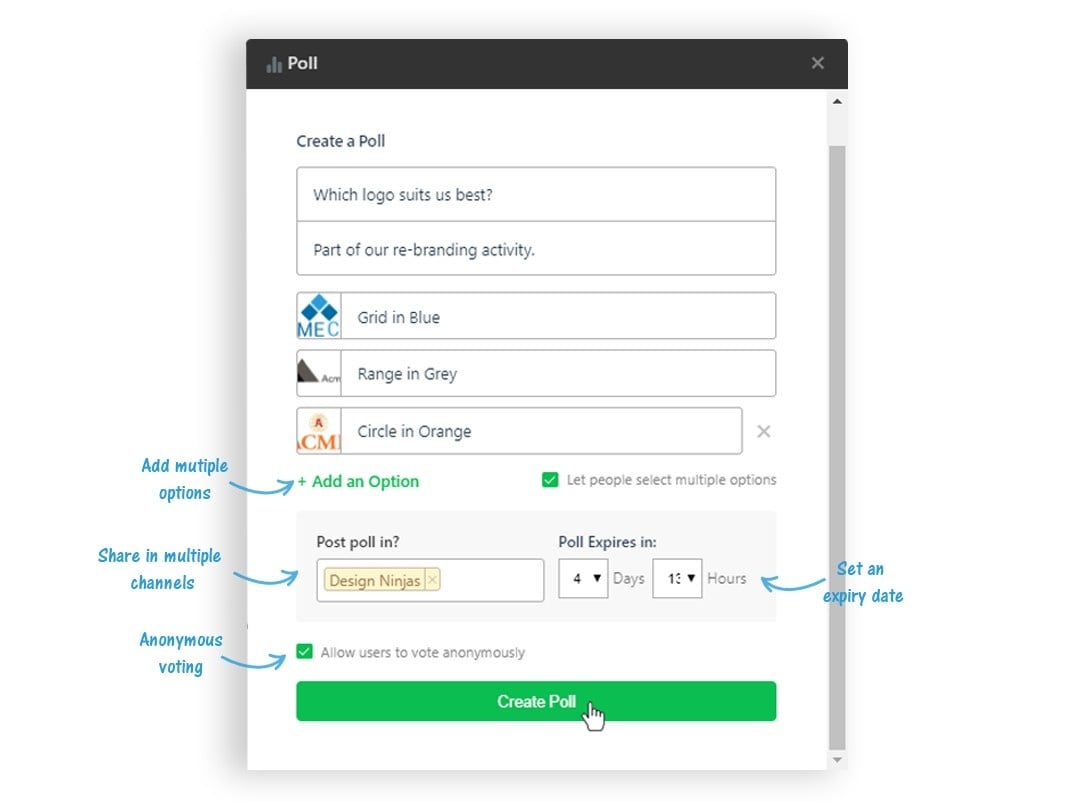
- Create quick surveys, get everyone’s opinions and make important decisions faster.
- Click on the Poll button, ask a question, enter options and post your poll.
- Download a .csv file of the consolidated results in a neat table format
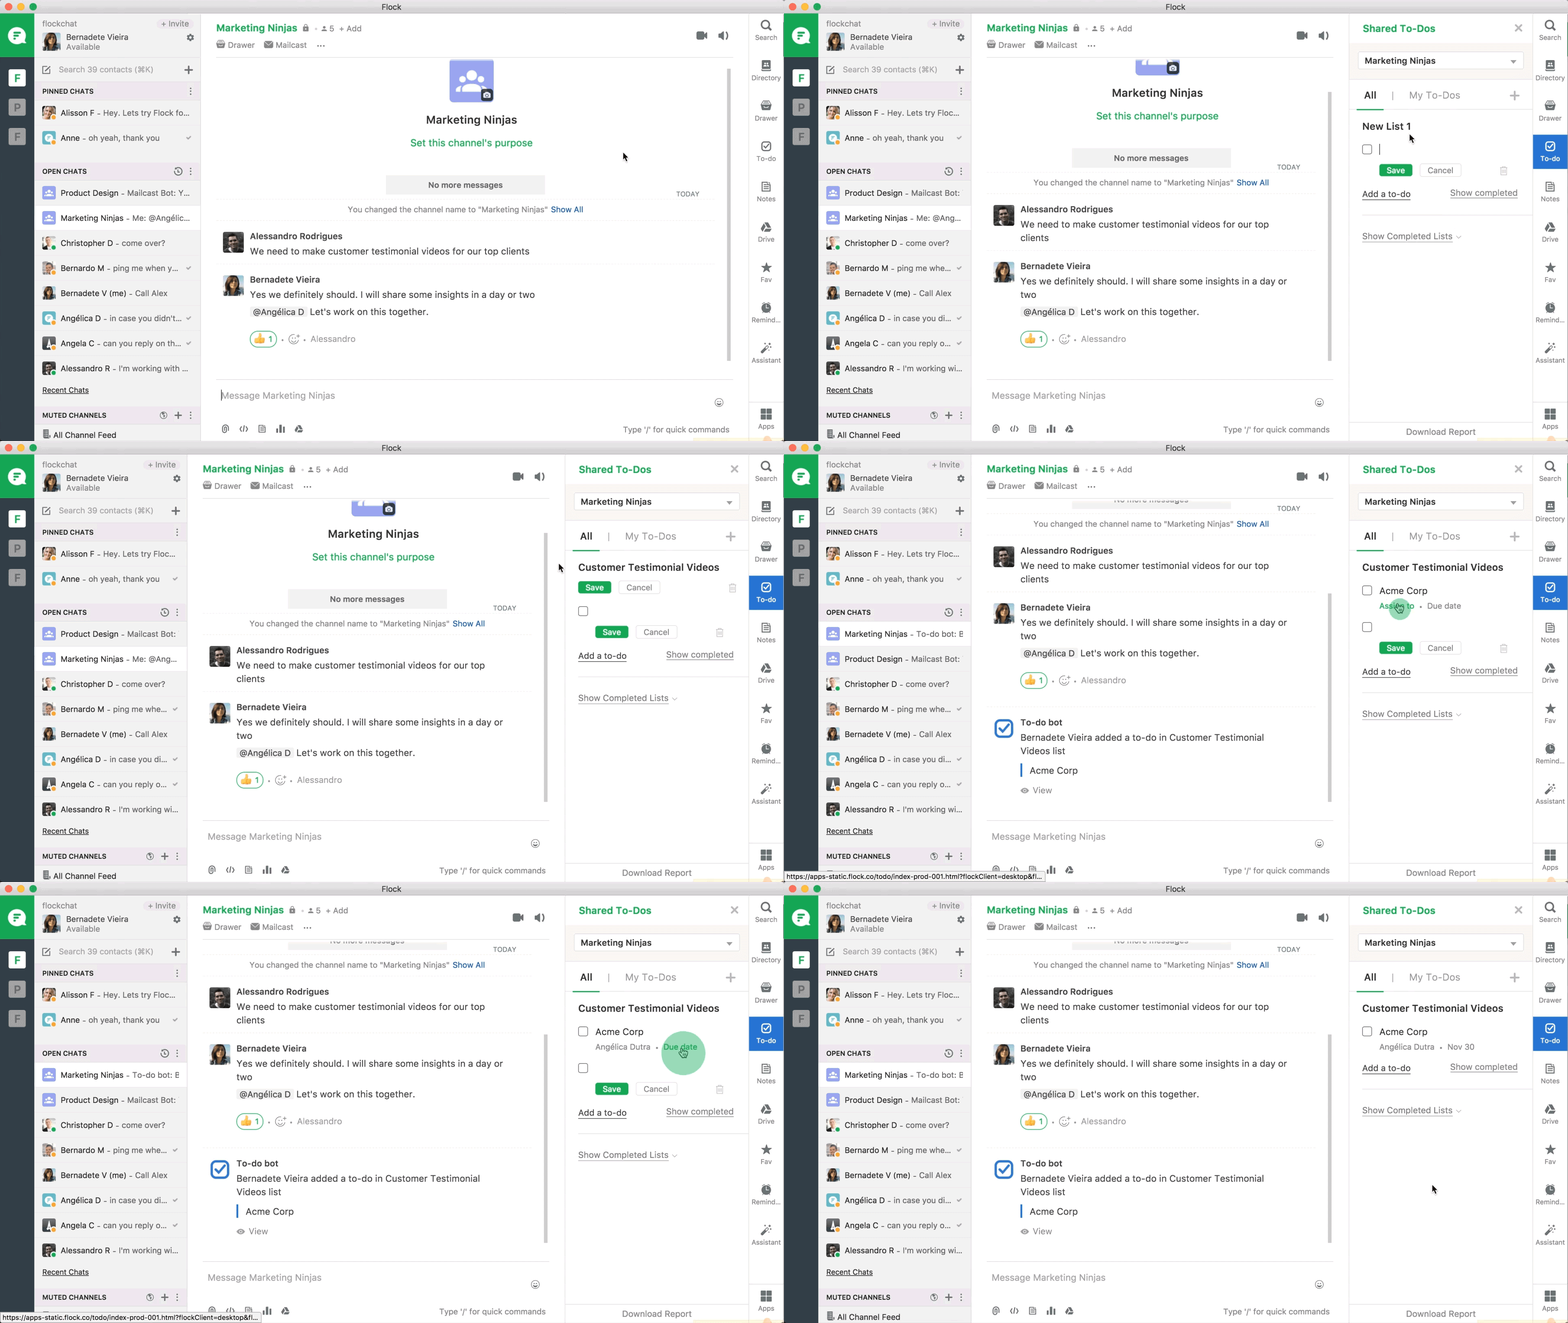
- Assign tasks to yourself and your team, with due dates, by using the Shared To-dos app.
- Click on the View shared to-dos button in the apps sidebar to view pending and completed lists, and to create new to-dos for you and your teammates.
- The shared to-dos bot will remind you every morning of tasks due on that day.
- Alternatively, you can also use the Todoist app in Flock to stay updated with your tasks.
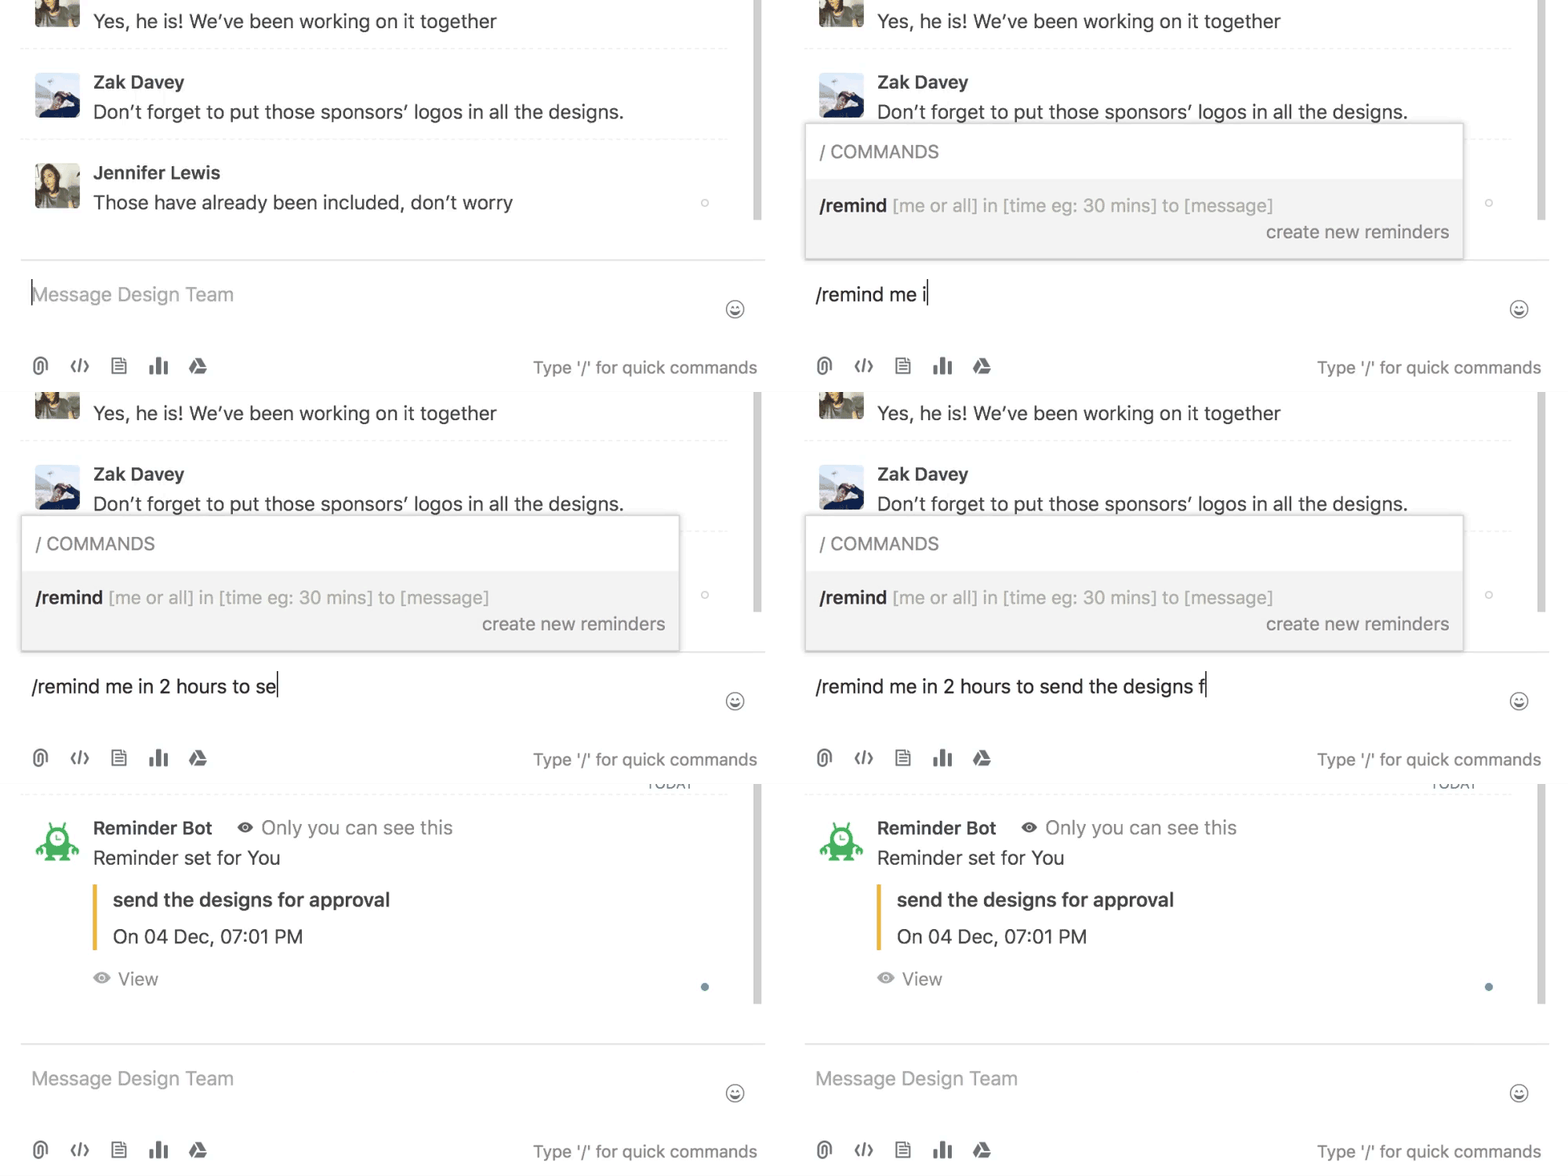
- Set reminders for yourself and your teammates for just about anything. To add a new reminder, just enter a slash command:
- /remind [me or all] in [time eg: 30 mins] to [message]
- Or set a reminder against any message in a chat by clicking on the message action button and selecting Set Reminder
- You can also create, assign and view reminders by clicking on the Reminder icon in the apps sidebar
- Flock’s Reminder Bot will notify you when it’s time.
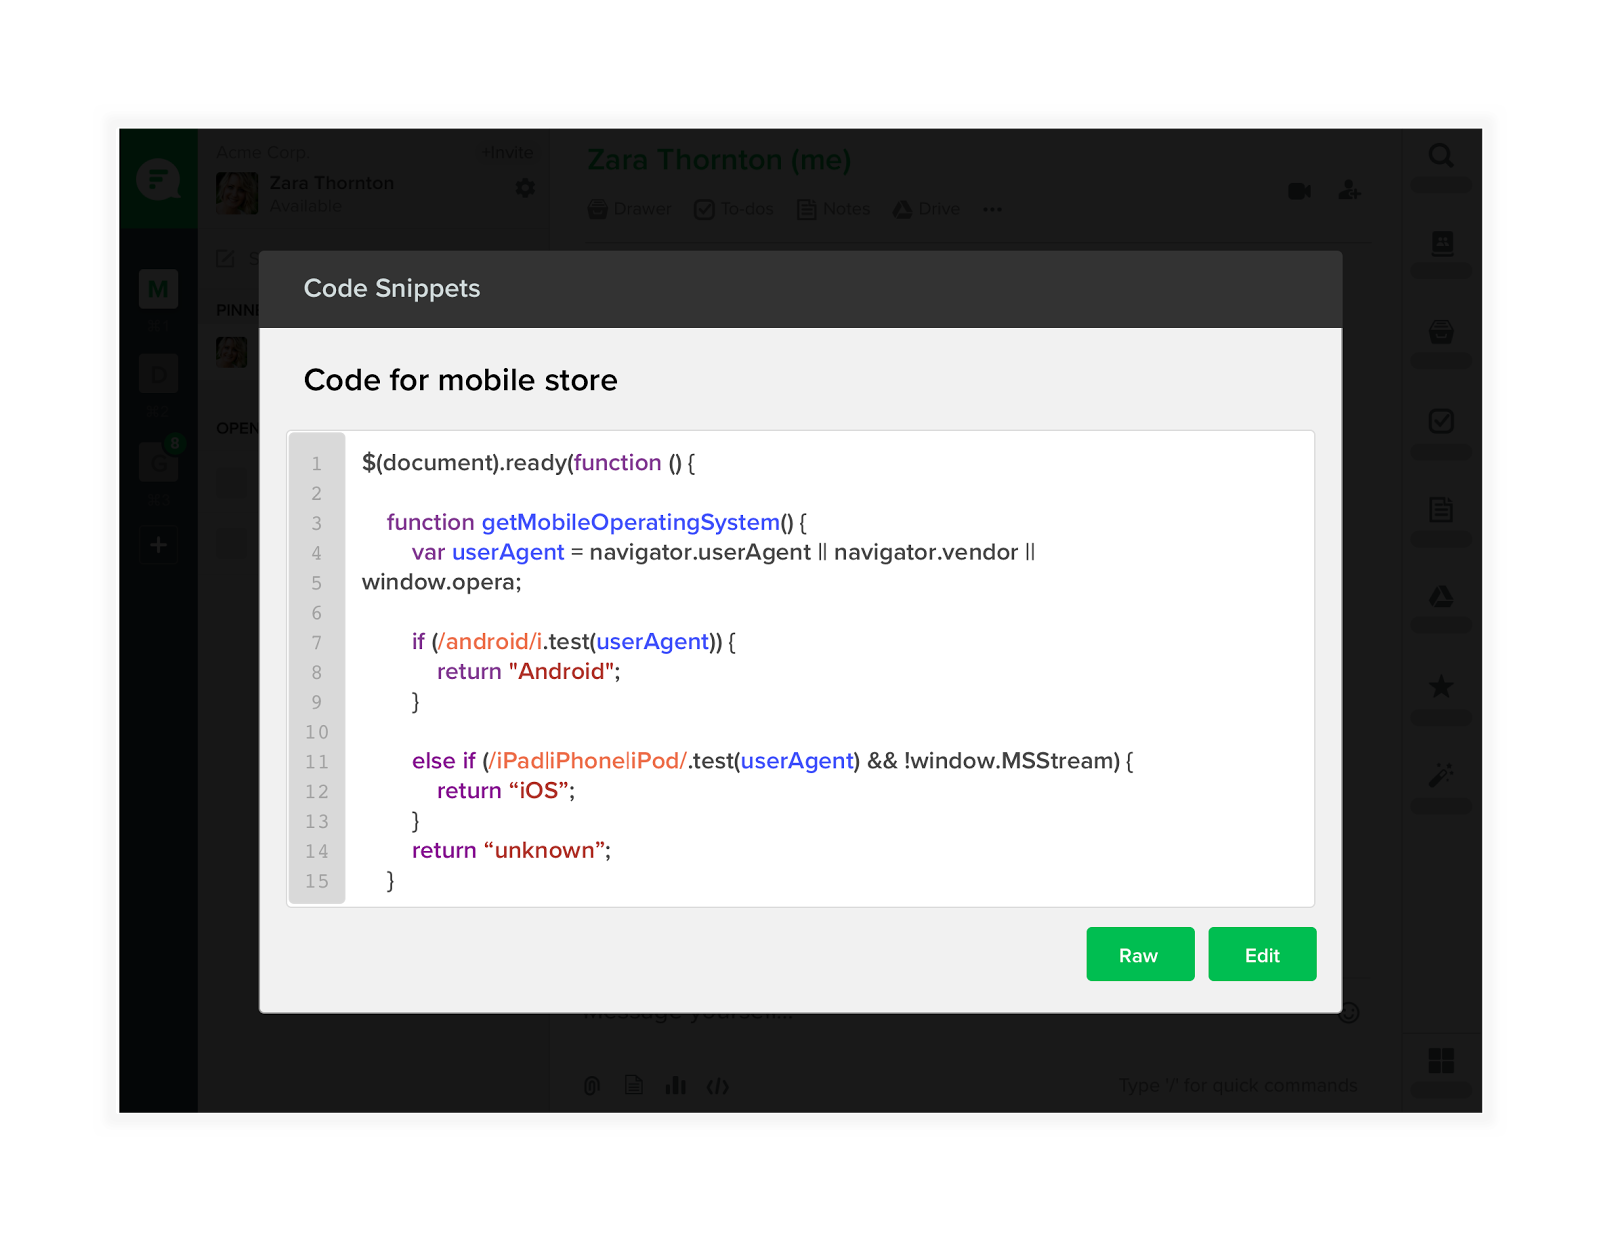
- Download, forward, edit, and reuse code within Flock itself. Sharing code among developer teams has never been easier!
- Click on the Code snippets button, paste your code and share.
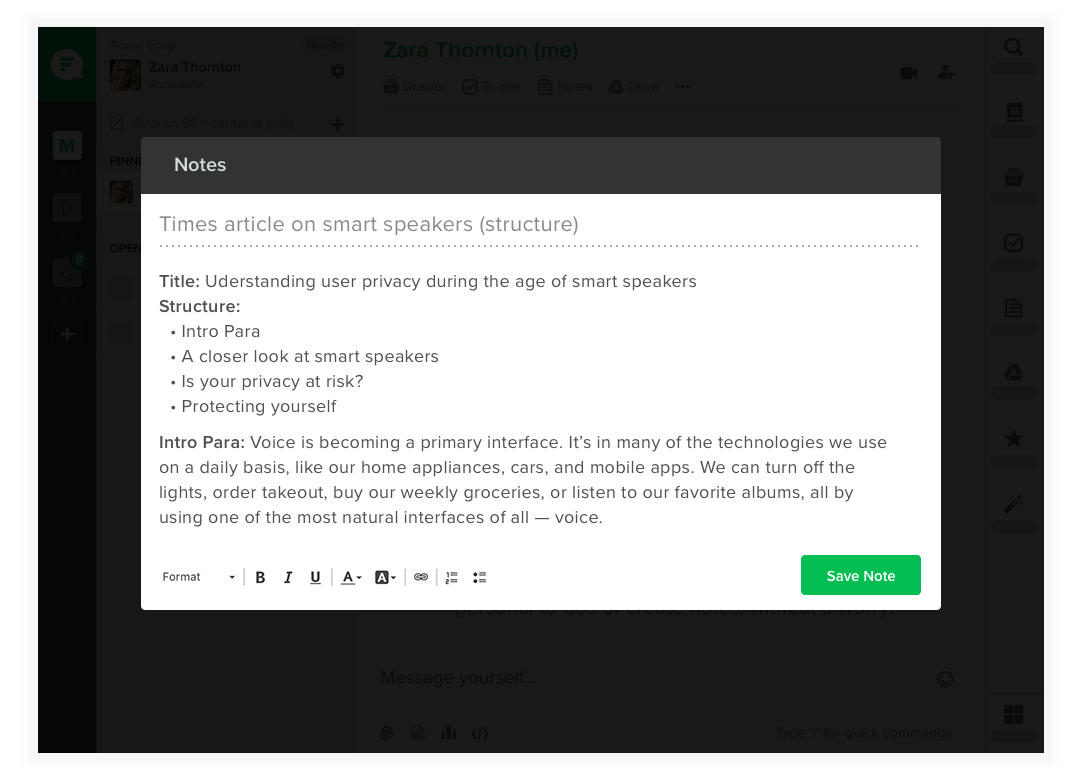
- Create, edit, publish notes and share them with your team members.
- Click on the Notes button to jot down points, save important drafts, and share ideas with your team.
- You can forward a note to any chat or channel. Any edits to the note are replicated across all conversations.
- Favorite important files, messages, and links to find them easily, instead of scrambling through long chat logs.
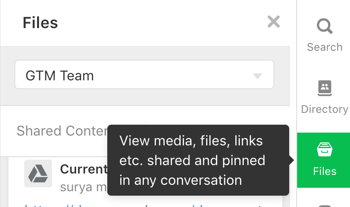
- Or pin them to the Files, so members of a conversation (chat/channel) can find them easily.
- With Flock, you can send emails to all members of a channel instead of entering a hundred email IDs on an email. Never worry about accidentally leaving someone off the chain!
- Simply click on the Mailcast letter icon in a given channel. Flock groups everyone in the channel into a custom mailing list, gives you the email alias address, and presto! you can email everyone in one go.
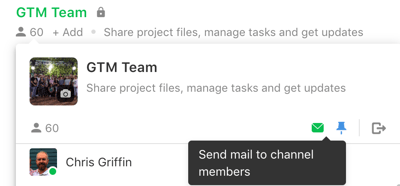 Send emails to a channel
-
-
-
-
- You can add people outside of your Flock account to your mailing lists. Edit, delete, deactivate and specify who can use your mailing list.
- Too many emails? You can also subscribe or unsubscribe to mailing lists.
-
-
-
Process Automation
-
-
-
-
-
- You can automate repetitive tasks with our process automation tool. Assign tasks and automate steps you and your team have to do repeatedly. This tool is quite robust, so head to our guide on Process Automation to get a deeper look. You won't regret it!
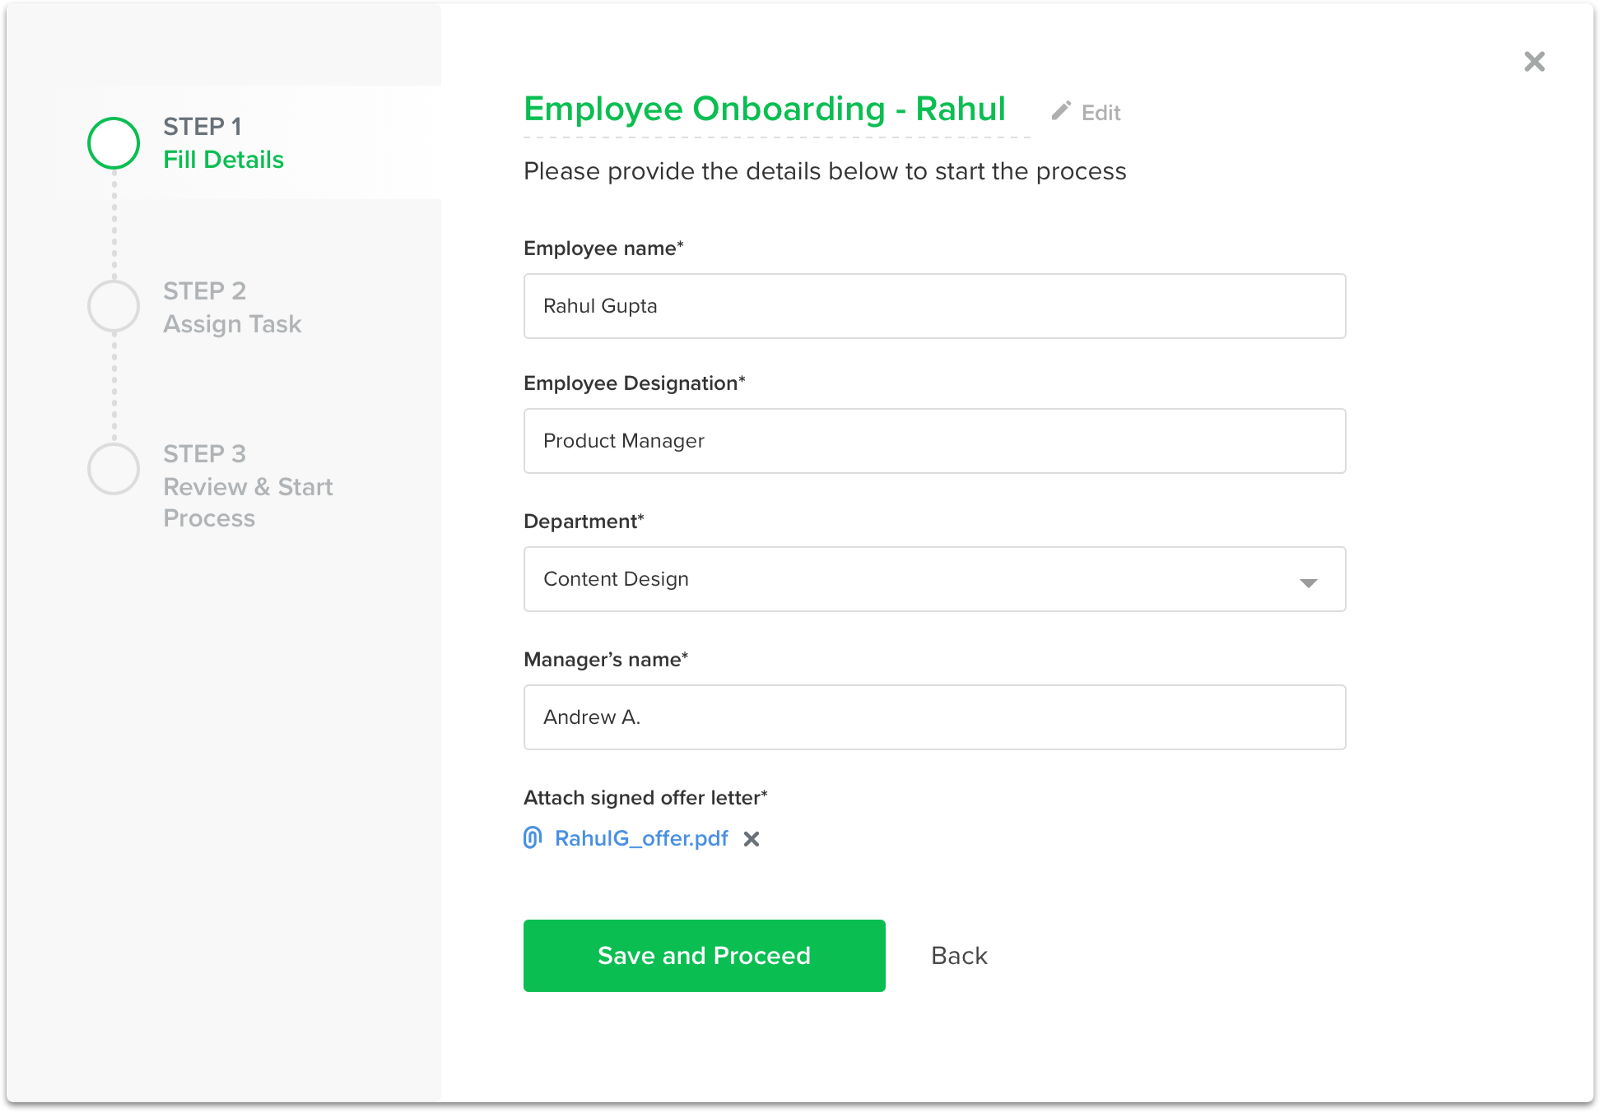
- You can automate repetitive tasks with our process automation tool. Assign tasks and automate steps you and your team have to do repeatedly. This tool is quite robust, so head to our guide on Process Automation to get a deeper look. You won't regret it!
-
-
-
-
- Process Automation
Integrate your favorite tools with Flock
Connect all the tools you use with Flock to avoid switching between apps. Find your favorite apps in our Appstore and plug them in to get all your notifications directly within Flock. Currently available apps include Trello, Github, Pingdom, Twitter, Facebook, Google Drive, JIRA and more.
- Step 1: To go to the Appstore, select Flock Appstore from the Flock menu or go to apps.flock.com.
- Step 2: Select the app you want to integrate with Flock and click on Configure.
- Step 3: Click on Add new configuration.
- Step 4: Select the Flock channel to which you want to post the updates or your personal chat tab and the action that should trigger a notification.
- Step 5: Enable the integration.
- Step 6: You can view and manage the integrations you’ve set up by going to Manage Apps under the Flock menu.
Flock has some of the best third party apps already available to integrate, and a whole bunch more in the pipeline. Learn more about the Flock Appstore.
Can’t find what you’re looking for in our Appstore? Create custom integrations with webhooks by selecting the Domain Admin Panel option in the Flock menu.
This post was updated in October 2019 with new information.


